Last week, I mentioned that one challenge I have encountered since moving to the city has been finding a
quiet place. A place where it is a little easier to slow down, take a deep breath, and relax. While it has been a struggle, I have lived here over two years, so I have found a few places.
Davis Islands is one of those places. While, it is an island, I refer to it as more of a quaint community (located at the mouth of the Hillsborough River) that is the hidden jewel of Tampa. It is one of few areas of wide open space. It overlooks the water and is free to the public, but shhhhhhhhhh....it's not over saturated with people.
Davis Islands is where the photos I will share today were taken. I have previously shared photos from this location, as it is prime for
silhouettes (more
here).
Davis Islands is prime for back lit shots too. I was able to capture some sweet moments between my son and husband during our recent picnic there.
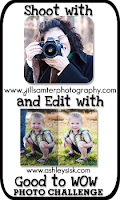
The above SOOC shot I shared for
Good to Wow this week. My edits were simple, which is what I love about backlighting. If you nail your exposure in camera, your photo needs very little editing, because the creativity comes from the light flooding into the camera while taking the shot.
I opened the photo is Adobe Camera Raw where I adjusted the white balance, increased the blacks (5), and contrast (8).
NOTE: If you are editing a backlit shot avoid increasing the blacks and contrast too much. It will eliminate the haze effect, which is part of the beauty of a backlit shot. Now that I look at it, I increased my contrast too much eliminating some of the haze effect seen in the
SOOC shot. Same thing with decreasing exposure. Your histogram will read overexposed, but again that is due to the light spilling into your lens. If you decrease your exposure, it should be very little.
I, then, opened the photo is PSE 8 and straightened the horizon; duplicated the background changing the layer to soft light at 13% opacity (primarily for a color boost); added a hue/saturation layer decreasing the reds (-6) and increasing master to (8); flattened and sharpened/resized for web.
Since I am linking up with my friend Courtney over at
Click It Up A Notch, I should share what I learned. I learned that if you don't practice what you learned, you will forget. Well, I already knew that, but it took me a while to get my settings right for these back lit shots, because I hadn't taken any in several months.
If you want some tips on how to achieve the haze affect which is typically a result of backlighting visit Courtney's
6 Steps to Create a Haze Effect.

.jpg)